Bose Lifestyle DVD Home Entertainment Systems Operations Instructions Page 22
- Page / 64
- Table of contents
- TROUBLESHOOTING
- BOOKMARKS
- Blu-ray Disc™/ 1
- DVD Home Theatre 1
- To reduce the risk of fire 2
- On power sources 3
- Copy Protection 4
- Copyrights and 4
- Trademarks 4
- End User License 5
- Information 5
- About These 6
- Operating 6
- Instructions 6
- Table of Contents 7
- Unpacking 8
- Index to Parts and Controls 9
- Front panel display 10
- Rear panel 10
- Surround amplifier 11
- Remote control 12
- Step 1: Installing the 14
- Step 2: Connecting the 14
- SPEAKERS 15
- IMPEDANCE USE 15
- Connecting the TV 16
- A High quality 17
- Getting Started 18
- When you make connection A 18
- When you make connection B, C 18
- Step 3: Preparing for 19
- Network Connection 19
- Step 4: Setting up the 20
- Wireless System 20
- LINK/STANDBY 21
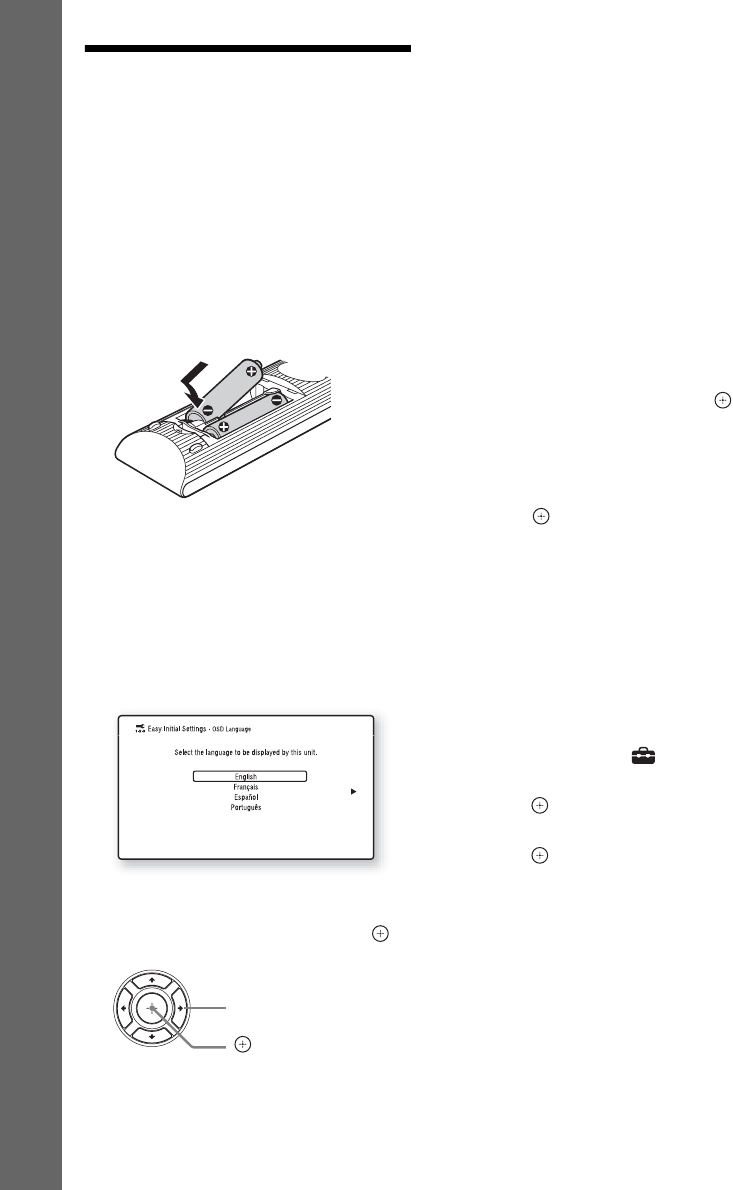
- Step 5: Performing the 22
- Easy Setup 22
- Step 6: Selecting the 23
- Step 7: Enjoying 23
- Surround Sound 23
- Playing a Disc 25
- Playing from a USB 26
- Enjoying an iPod/iPhone 27
- Playing via a Network 28
- Playing the same music in 29
- STREAMING) 29
- Available Options 30
- Playback 31
- [Video] only 31
- Adjusting the delay between 32
- Selecting the Audio 33
- Format, Multilingual 33
- Tracks, or Channel 33
- Enjoying Multiplex 33
- Broadcast Sound 33
- Listening to the Radio 34
- 1 Press HOME 35
- Setting the Speakers 36
- Using the Sleep Timer 37
- Preparing the remote for 38
- Browsing Websites 39
- Further Settings for the 40
- If wireless transmission is 41
- Using the Setup Display 42
- [Network Update] 42
- [Screen Settings] 43
- [Audio Settings] 44
- [BD/DVD Viewing 45
- Settings] 45
- [Parental Control 45
- [Music Settings] 46
- [System Settings] 46
- [External Input 47
- [Network Settings] 47
- [Easy Setup] 48
- [Resetting] 48
- Precautions 49
- Notes about Discs 50
- Troubleshooting 51
- Wireless sound 53
- Playback USB device 54
- BRAVIA Internet Video 54
- “BRAVIA” Sync ([Control for 54
- Playable Discs 55
- Playable Types of Files 56
- Supported Audio 57
- Specifications 58
- Additional Information 59
- Language Code List 60
© 2020, manymanuals.com. All rights reserved. | 1.599 s |
 Manymanuals.com
 Manymanuals.de
 Manymanuals.fr
 Manymanuals.it
 Manymanuals.pl
 Manymanuals.cz
 Manymanuals.es
 Manymanuals-pt.com
Comments to this Manuals